- Digital calipers
- Scraper
- Material
- 3 mm Allen wrench
- Post-processing materials
- D4K Pro Home Position Calibration Cubes.stl file
Primary Supplies
Get Started
To check, modify, or fine-tune the printer’s parallelism and home position, a Home Position Calibration Cubes.stl file is printed. The printer must be powered on for the duration of the parallelism calibration, and the home position calibration.
Note: Parallelism is achieved when the platform and material tray are aligned with each other. Home position is the lowest point of the build platform along the Z-axis, it is the start position of the build platform for printing.
NOTICE
Always remove the platform before taking the material tray out of the printer. Failure to do so can result in material dripping down into or onto the printer causing failed builds and damaged equipment.
Process Calibration .stl File
1. Download the Home Position Calibration Cubes.stl file to the computer where the Live Build DLP software is installed. See Primary Supplies to download the .stl file.
2. Open the Live Build DLP software and select a buildstyle. See Upload Buildstyle File for details.
3. Import the .stl file into the Live Build DLP software.
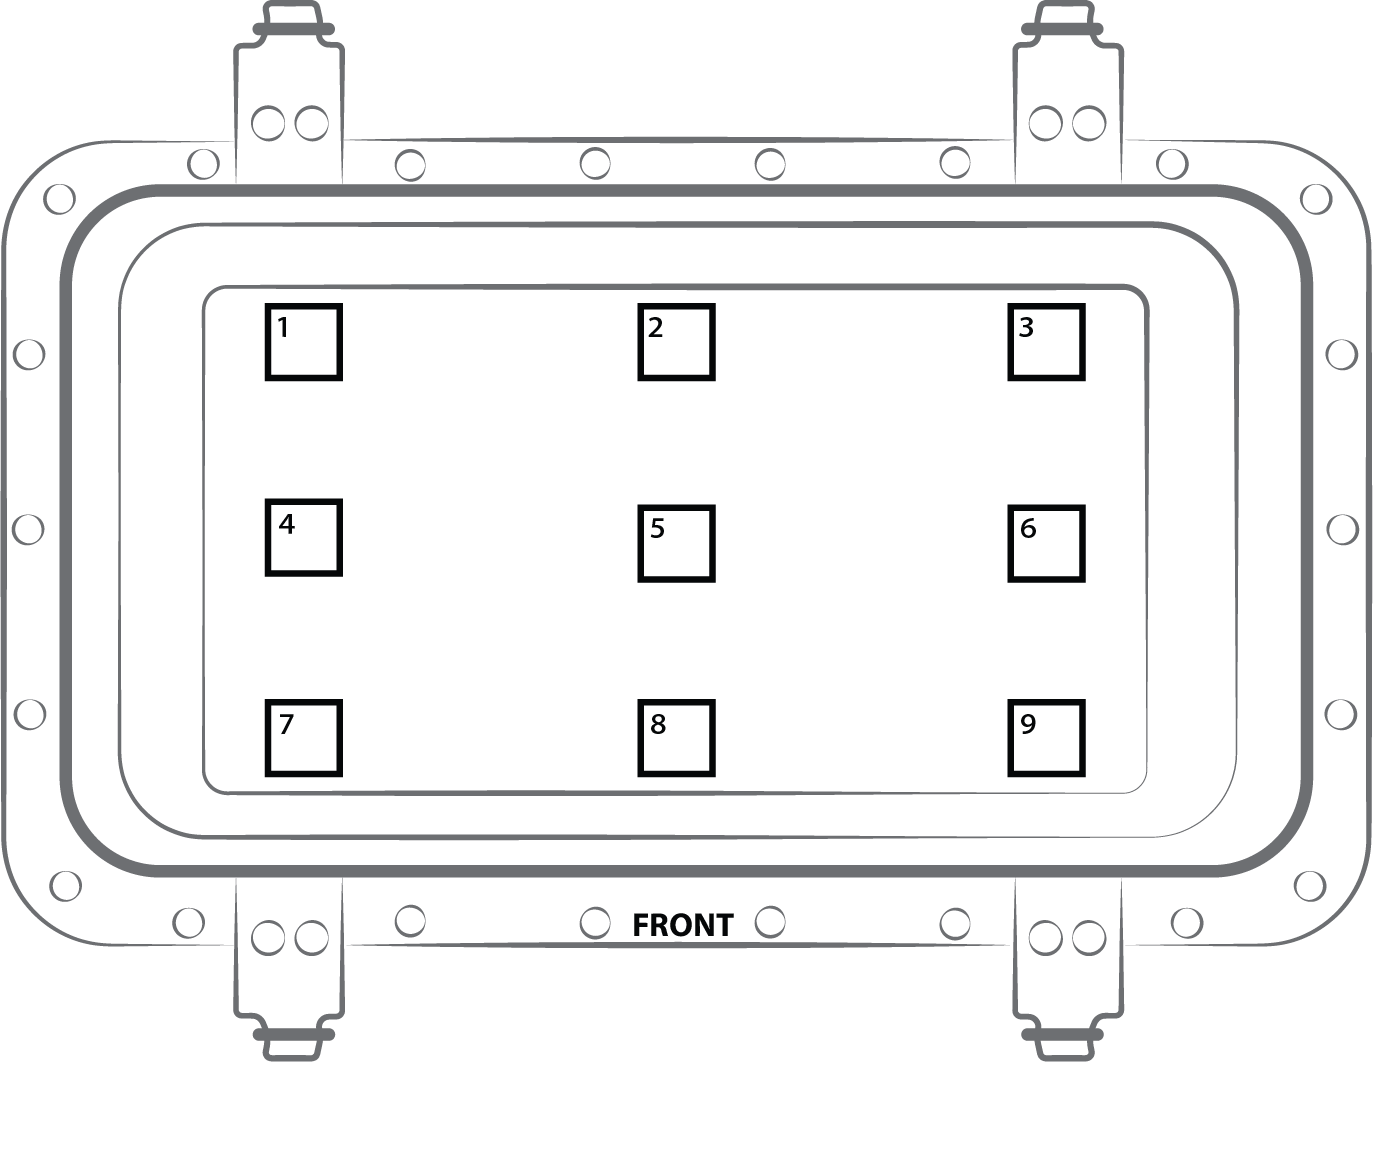
Note: Home Position Calibration Cubes.stlis a file made of nine blocks, each block is five millimeters high. This file is located on the USB drive that is shipped with every printer. The file is also available to download by contacting ETEC™ support, or an authorized distributor.
4. Print the Home Position Calibration Cubes.stl.
5. Once the print is completed, check if there are nine cubes on the platform.
6. If any of the cubes are missing, tap the Manual Debris Removal icon and remove any cured particles that settled to the bottom of the material tray, see Manual Debris Removal .
Post-Process
Important: Wear protective gloves for working with uncured printed cubes and measuring them.
1. Gently remove the calibration blocks from the build platform using the scraper that came in the Starter kit.
2. Clean and dry the printed models.
Important: Do not cure the printed cubes.
3. Take a close look at each printed block. There is a small number printed on each cube.
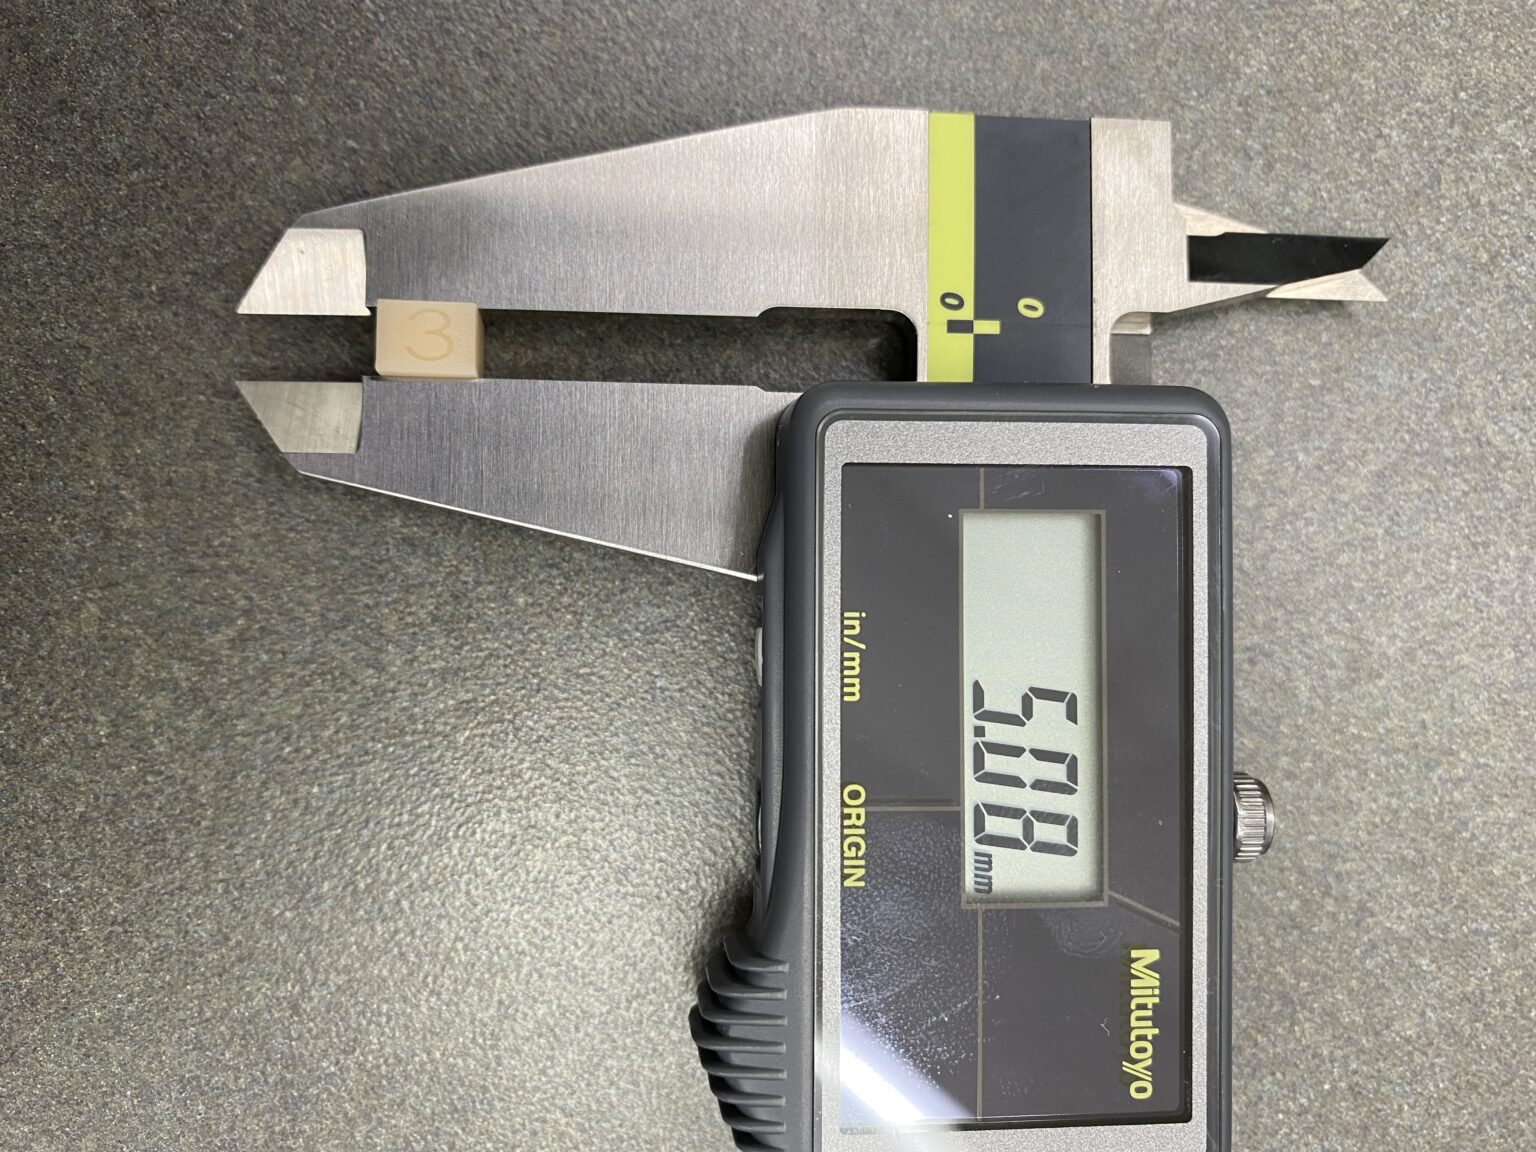
Measure
Measure the height of Cube 1 and write down the value in the Cube 1 section:
Continue writing the value for each cube until all cubes are measured.
- If all the blocks are within +/- 100 microns, then the printer is paralleled, and no further action is required.
- If all the blocks are within 4.85 and 5.05 mm, then the printer’s home position is correct, and no further action is required.
If the home position is correct and the printer is not paralleled, submit a tech support ticket via Customer Support at https://etec.desktopmetal.com/support/.
If the printer is paralleled and the home position is not correct, skip to the next section.
Adjust Home Position
Important: Do not adjust Home Position until the printer is parallel.
1. Remove the platform from the printer and place it aside on a clean work surface.
2. On the home screen, navigate to Settings > Move & Calibration > Home Calibration.
→ The following screen appears.
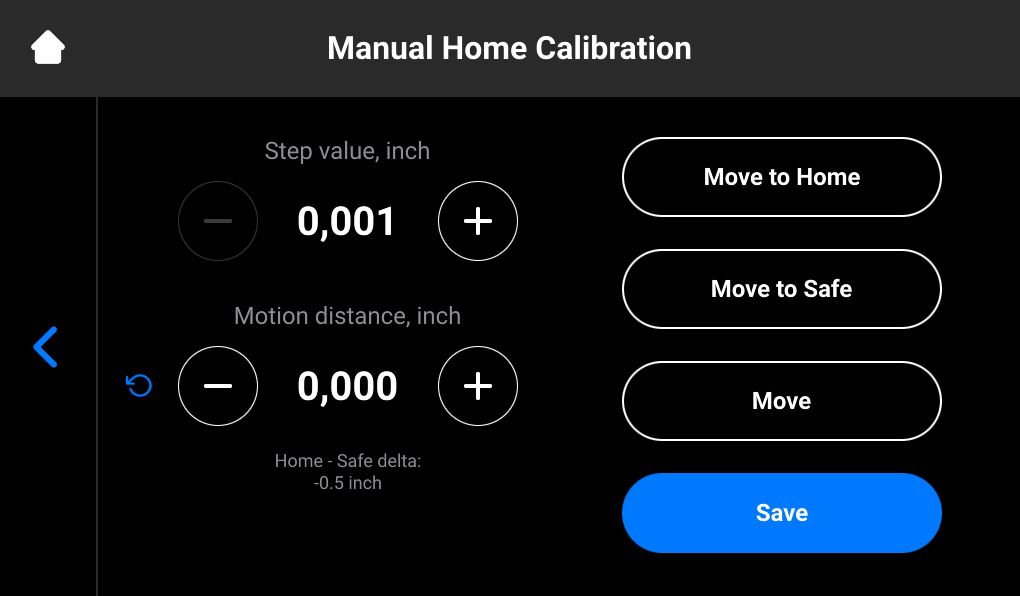
3. Set the value of a step by tapping the – and + icons of the Step Value. This is the increment used for the Motion Distance. The Step Value increments can be set to 0.01, 0.10, 1.00, and 10.00.
4. Set the motion distance of the platform by tapping the – and + icons of Motion Distance. This is the total distance the platform moves.
Tip: The positive values move the platform up; the negative values move the platform down.
Tapping the Refresh icon resets the motion distance value to zero.
5. Reference the values from section Measure to determine the new home position. The adjustment should be made based on the average height of the calibration blocks.
- If the average height measurement is below 4.85 mm, move the platform up by pressing Move the required number of steps.
- If the average height measurement is above 5.05 mm move the platform down by pressing Move the required number of steps.
6. Press Save.
→ The build platform holder starts moving up to the top of the Z-axis.
→ The new home position is set.