Orientation Considerations
The Xtreme 8K™ has a blade style recoater which passes over each layer during every print job. This blade travels in the Y direction. For best printing results, orient parts facing the X axis instead of the Y axis.
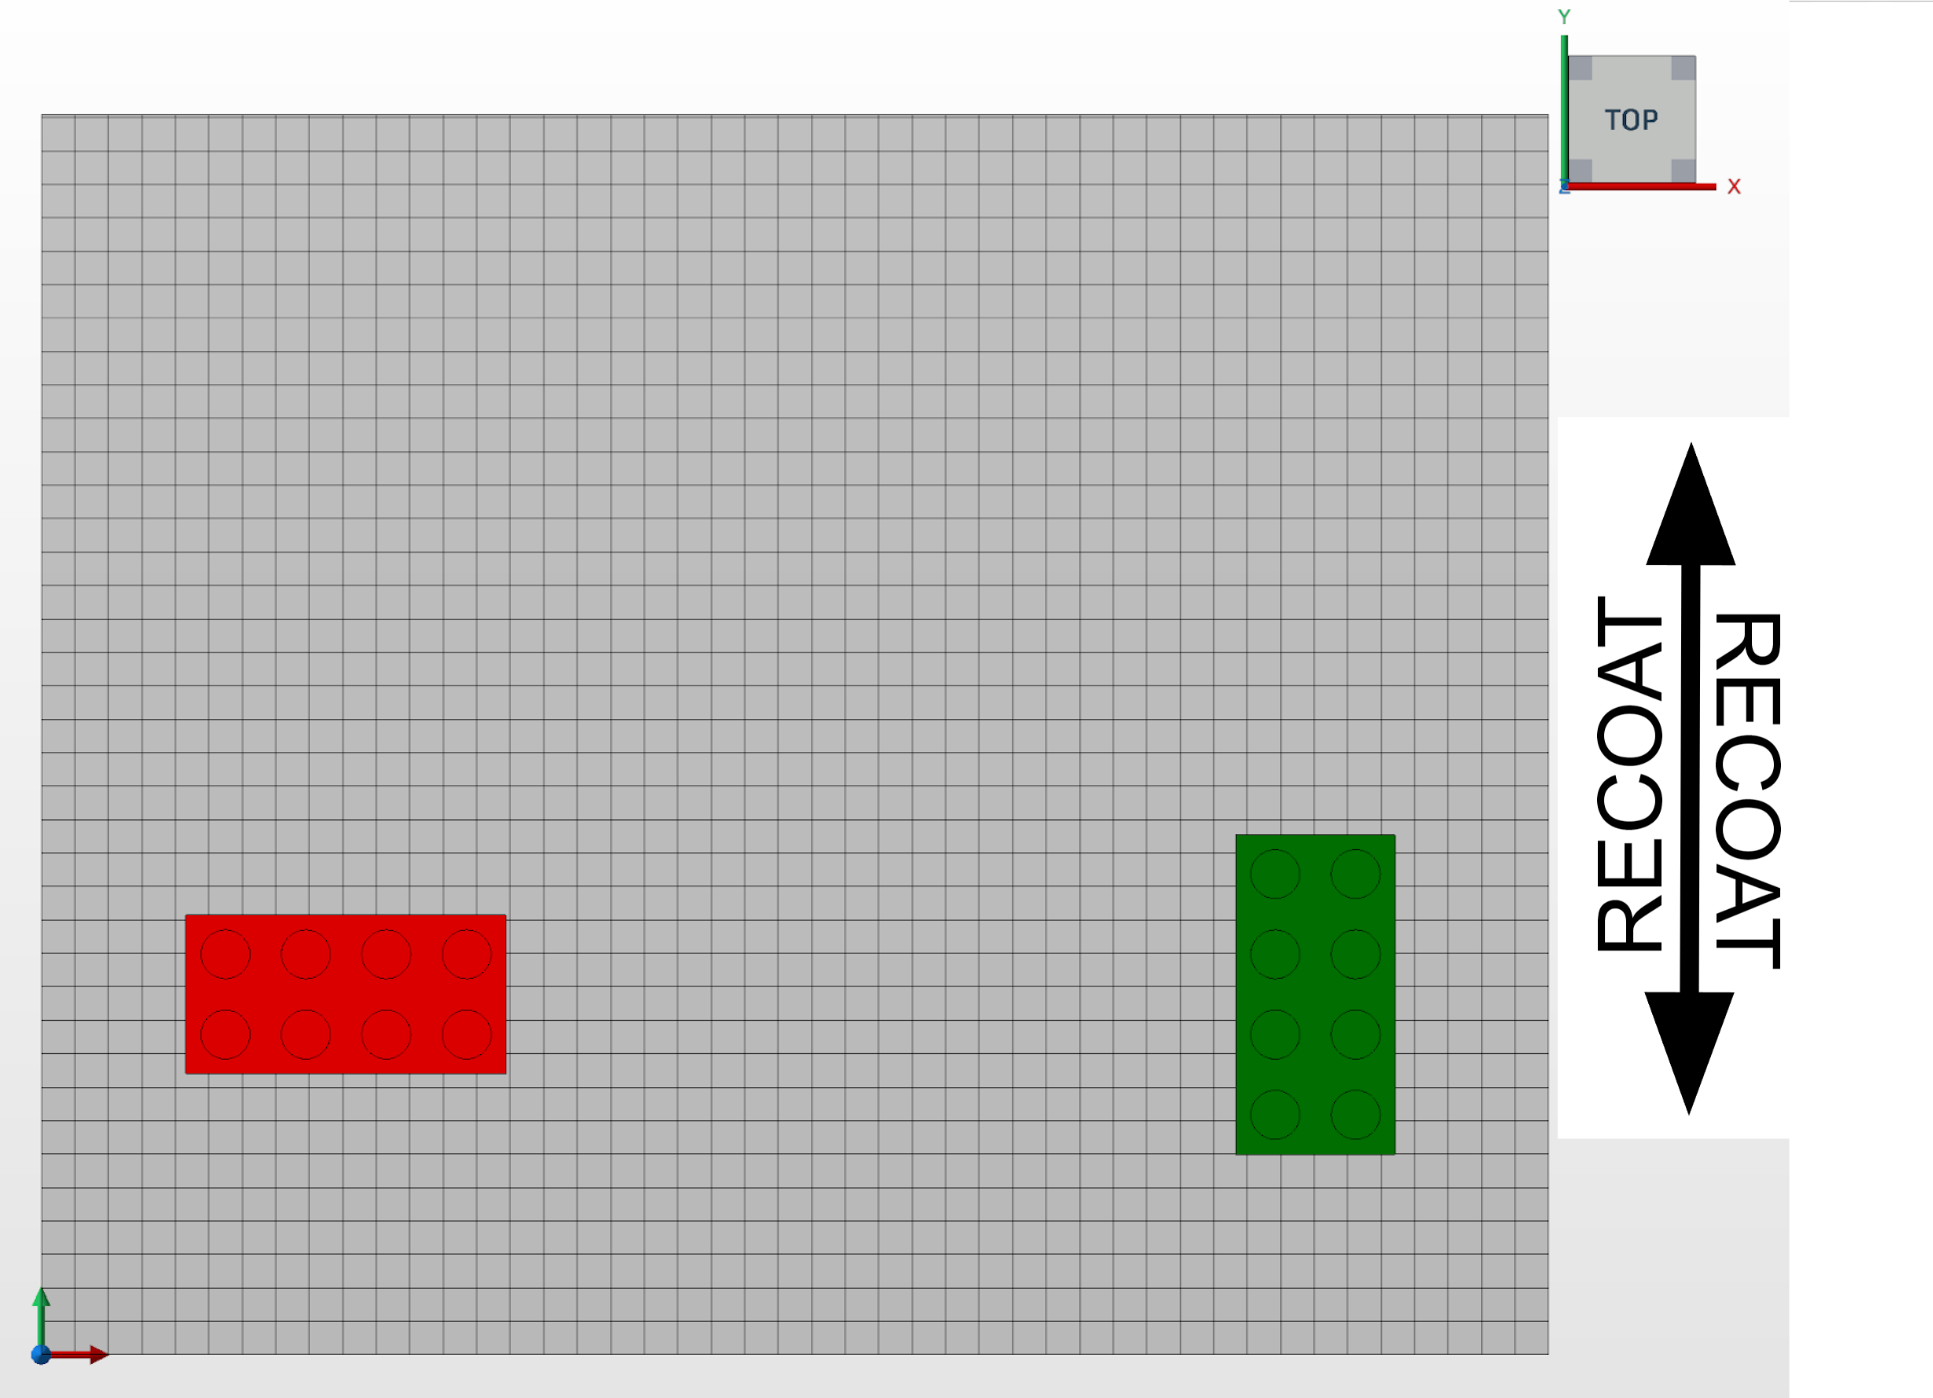
The same part placed in two orientations: the left part faces the Y axis and is not recommended; the right part faces the X axis and is best practice
Curling
Resin is cured by UV light in the DLP 3D printing process. This transition from liquid to solid results in internal stresses. If the internal stresses are not handled properly, then part warping can occur. This is especially prevalent for large flat areas printed along the XY plane.
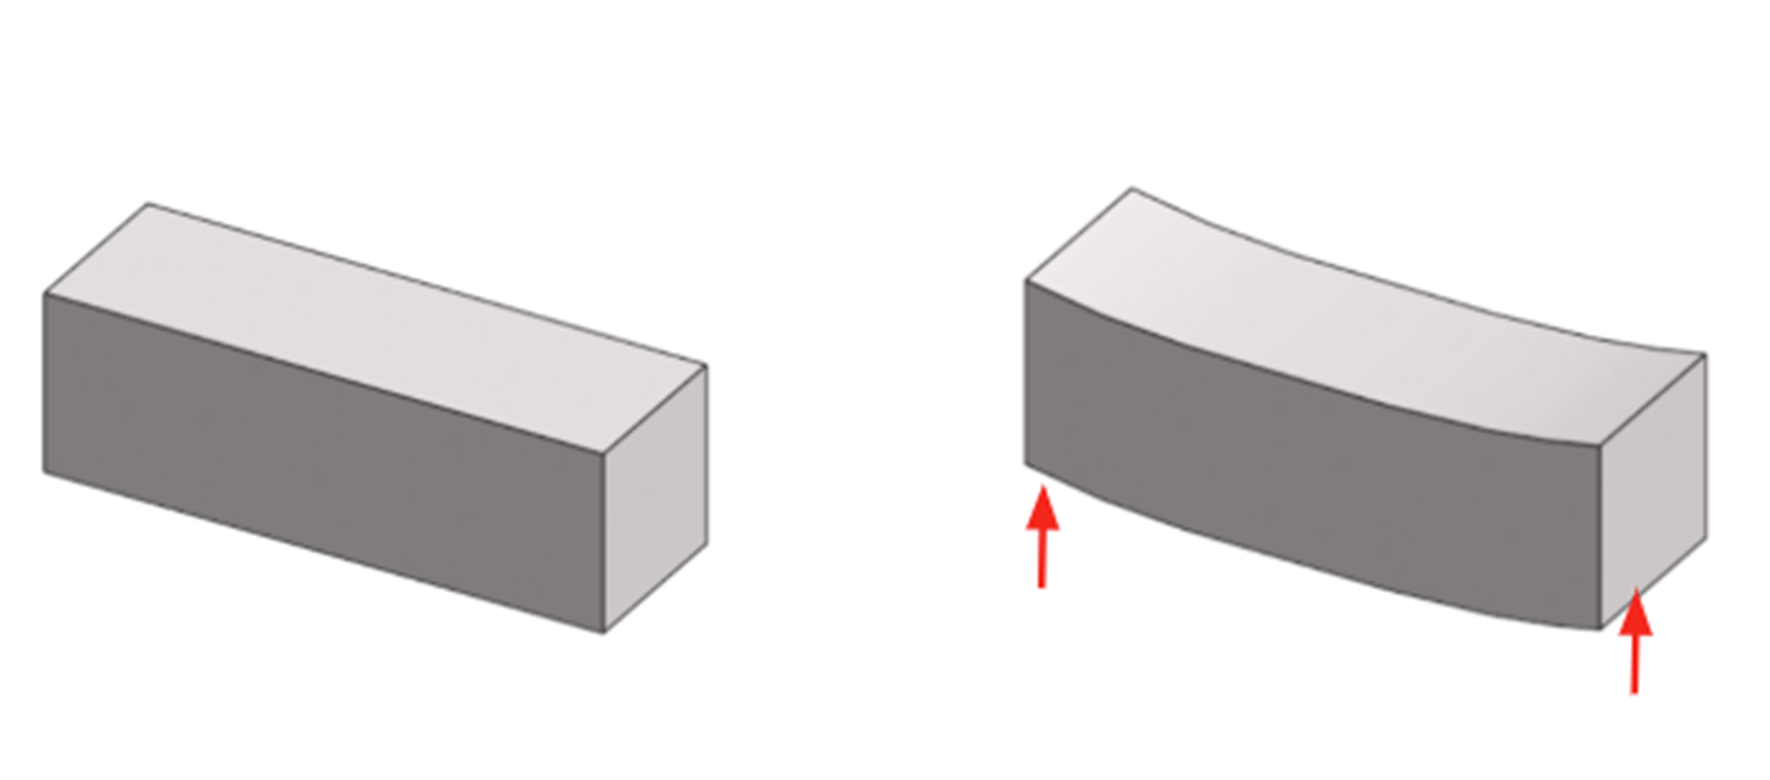
Curling is minimal for flat parts 75 x 75 mm and smaller. For parts over 75 mm in length, curling can become more prevalent.

Profile of a curling part over 75 mm in length
Avoid large flat surfaces when designing parts. If that is not possible, curling can be mitigated by a number of other strategies, sometimes in combination.
Lightweighting and Perforation
If large flat areas are required for the design, modify the flat surface via one of the following methods:
-
Lightweighting
-
Perforation
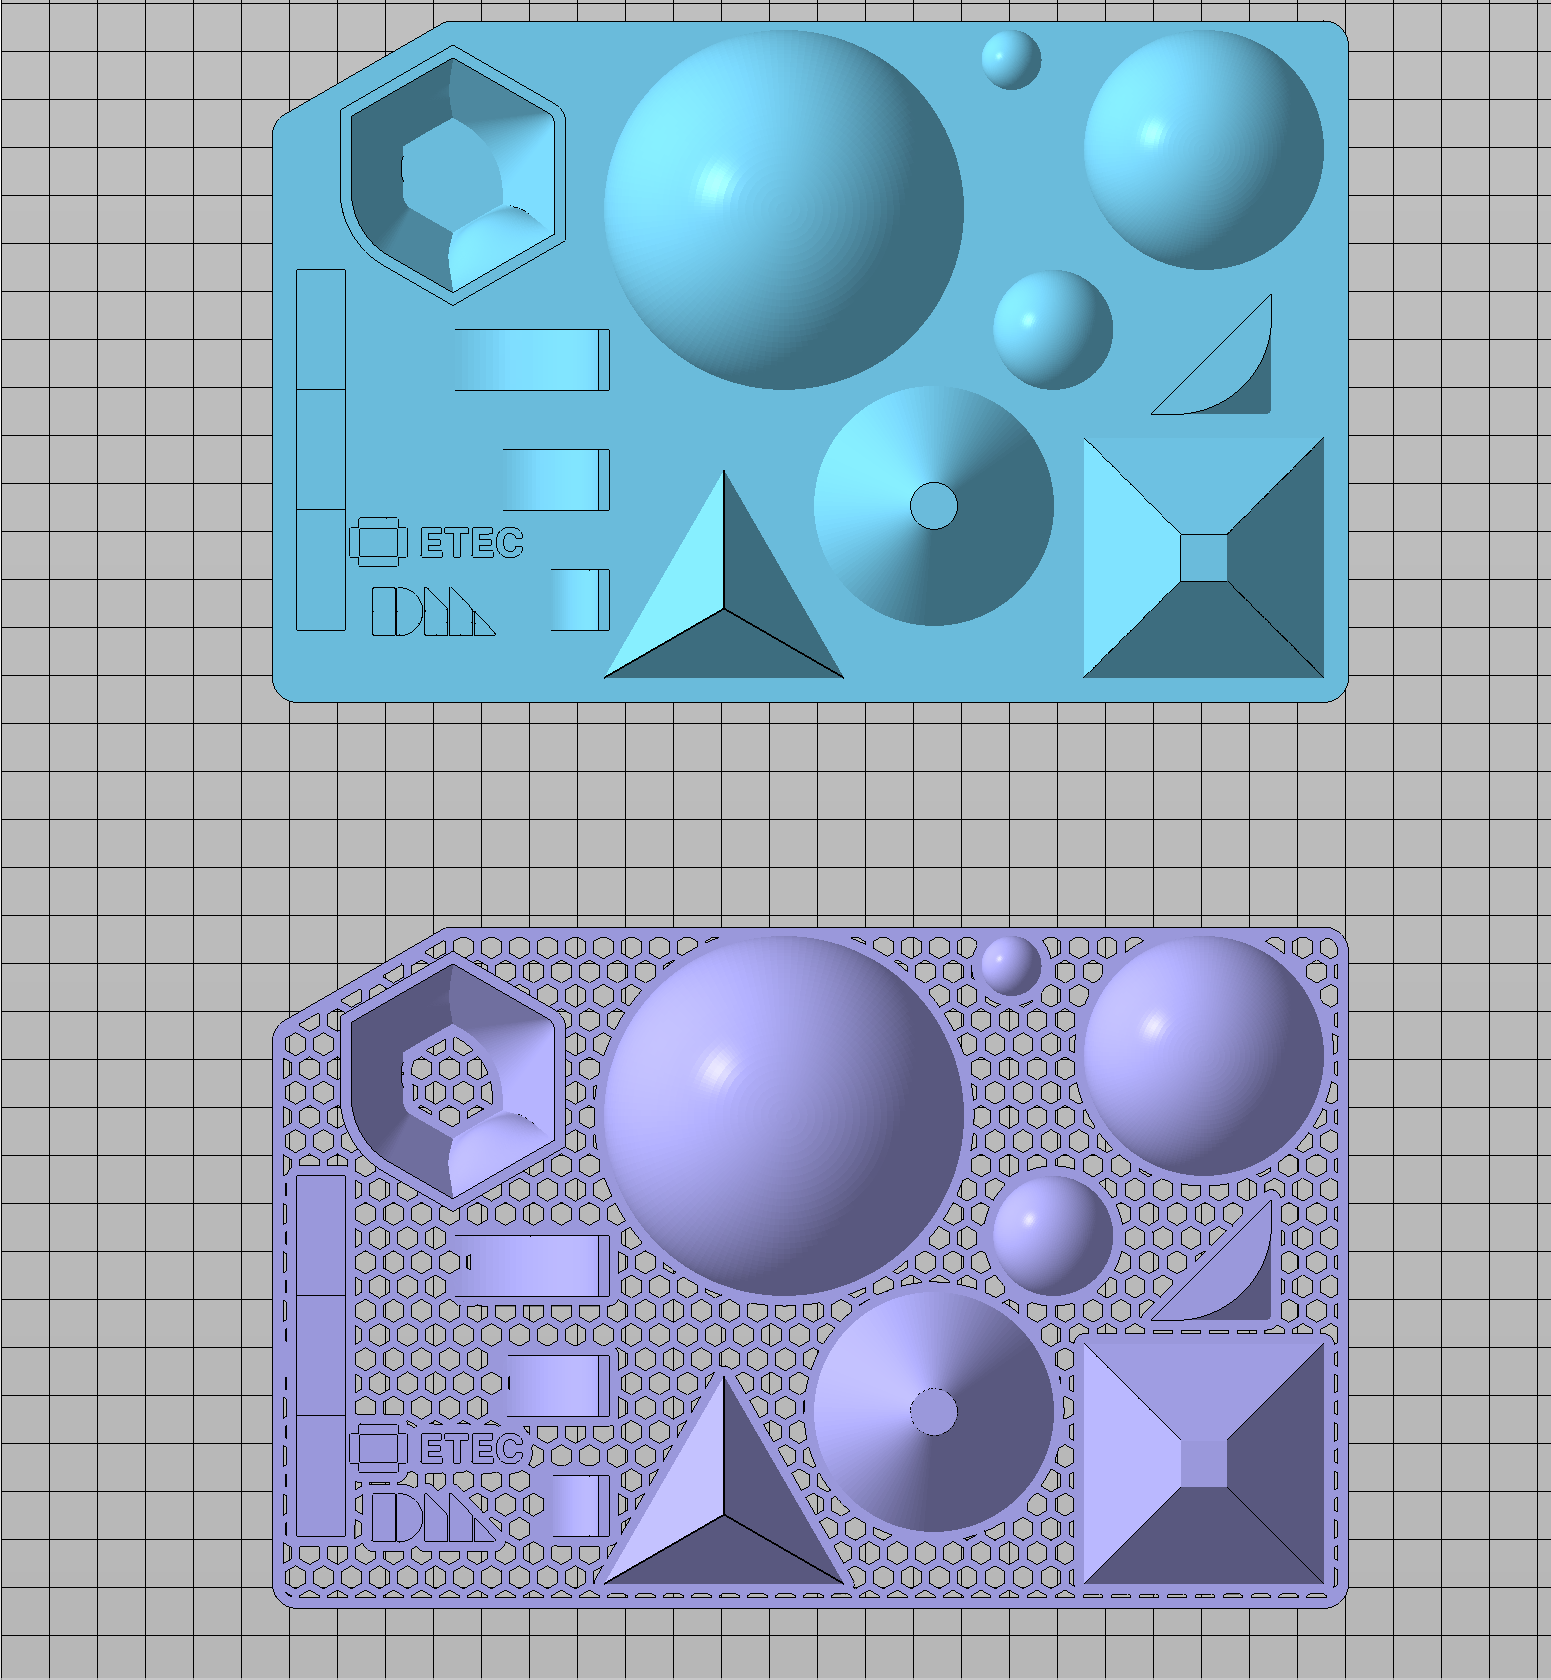
Sample part shown with a large flat surface (top), and a perforated surface (bottom)
The lightweighting and perforation reduce the surface area of the layer, which in turn makes the part behave like it is smaller and thus helps to reduce curling forces. Lightweighting and perforation also reduce material use.
Part Orientation
Orientating the part on an angle separates the large surface area into smaller sections during the printing process. This reduces the separation forces, leading to less part curling.
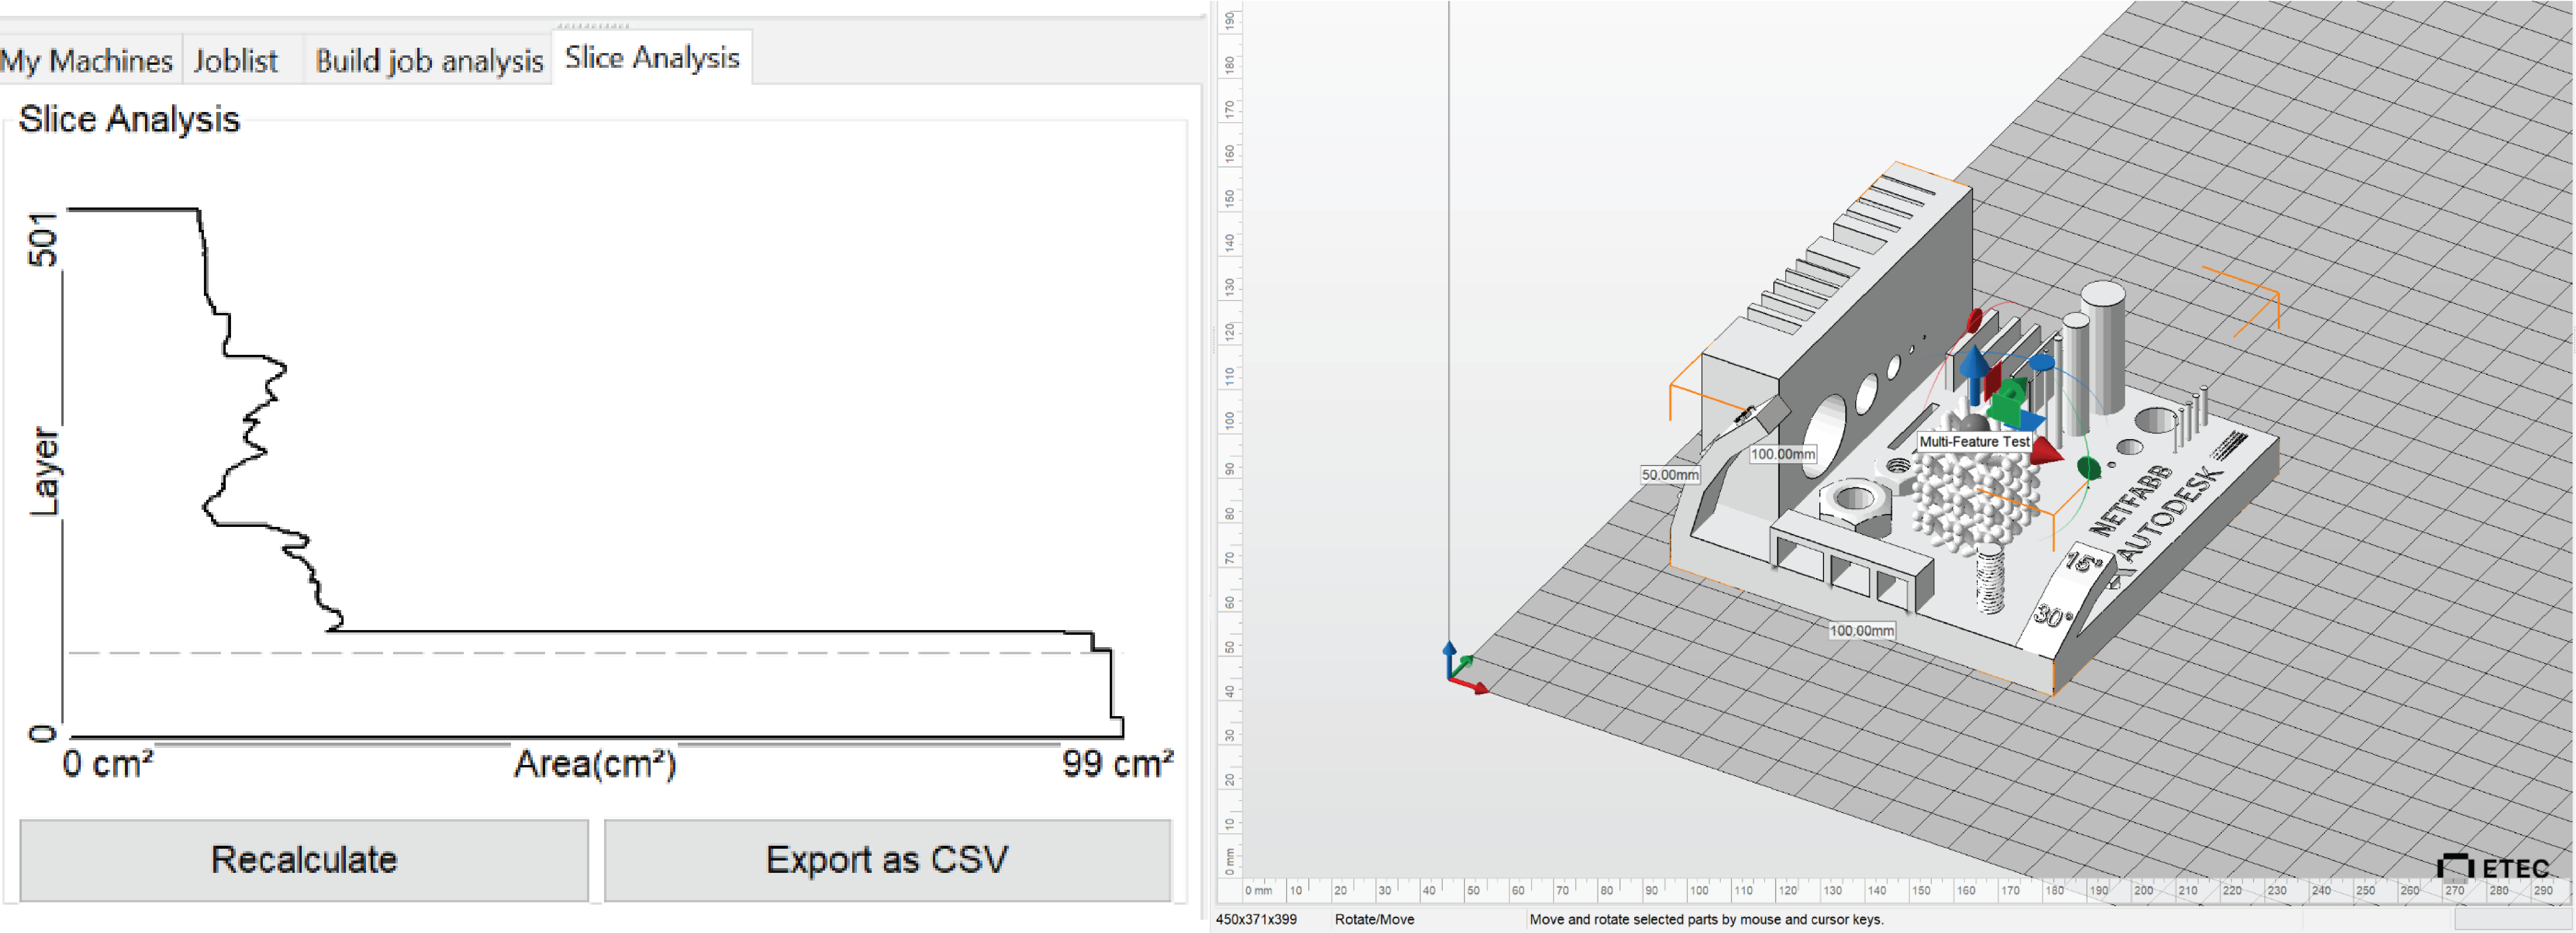
Part with a large surface oriented flat-to-plate. It has a large and rapid change in area in the Slice Analysis, left
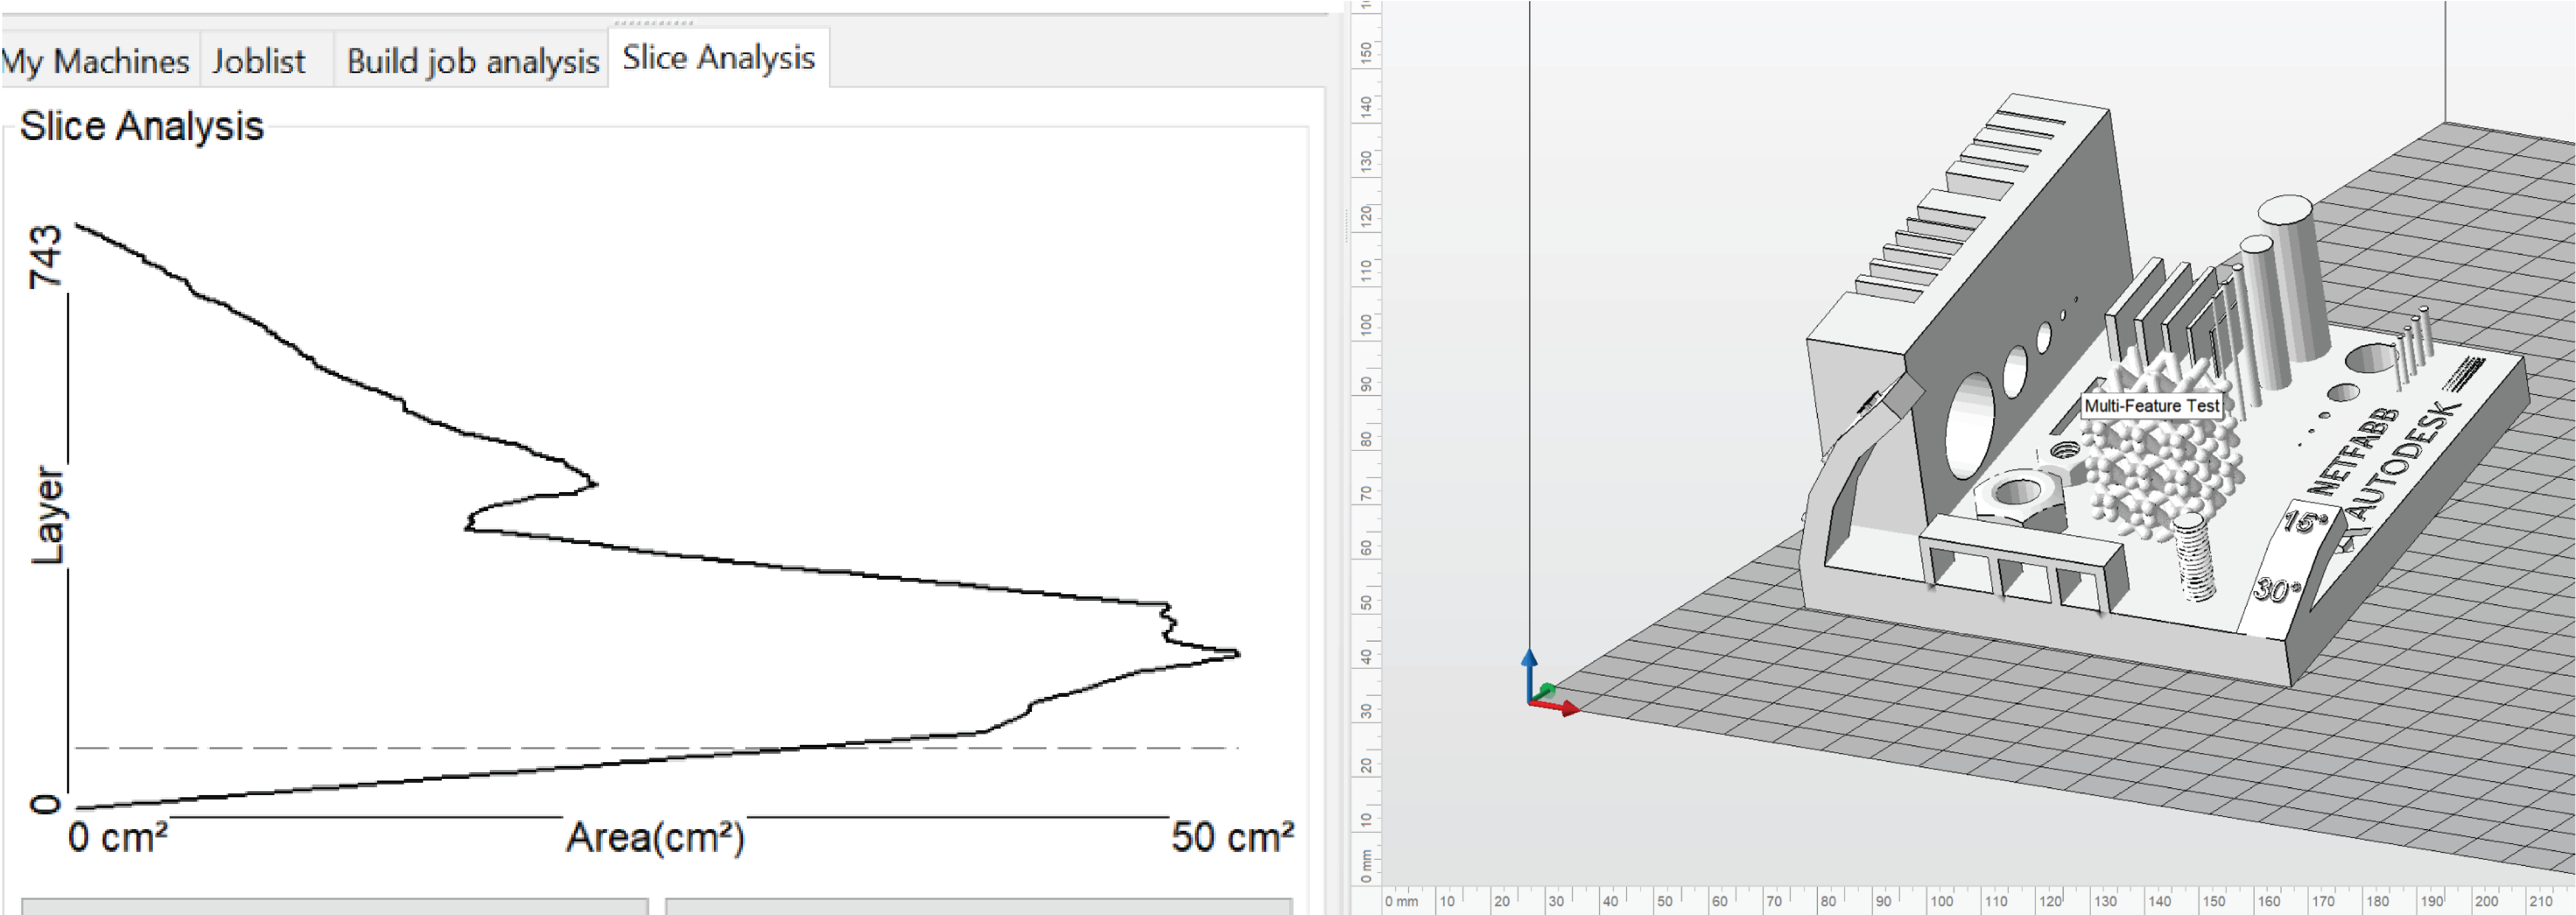
The same part rotated 15 degrees in one axis has a smoother transition between layers and lower peak value
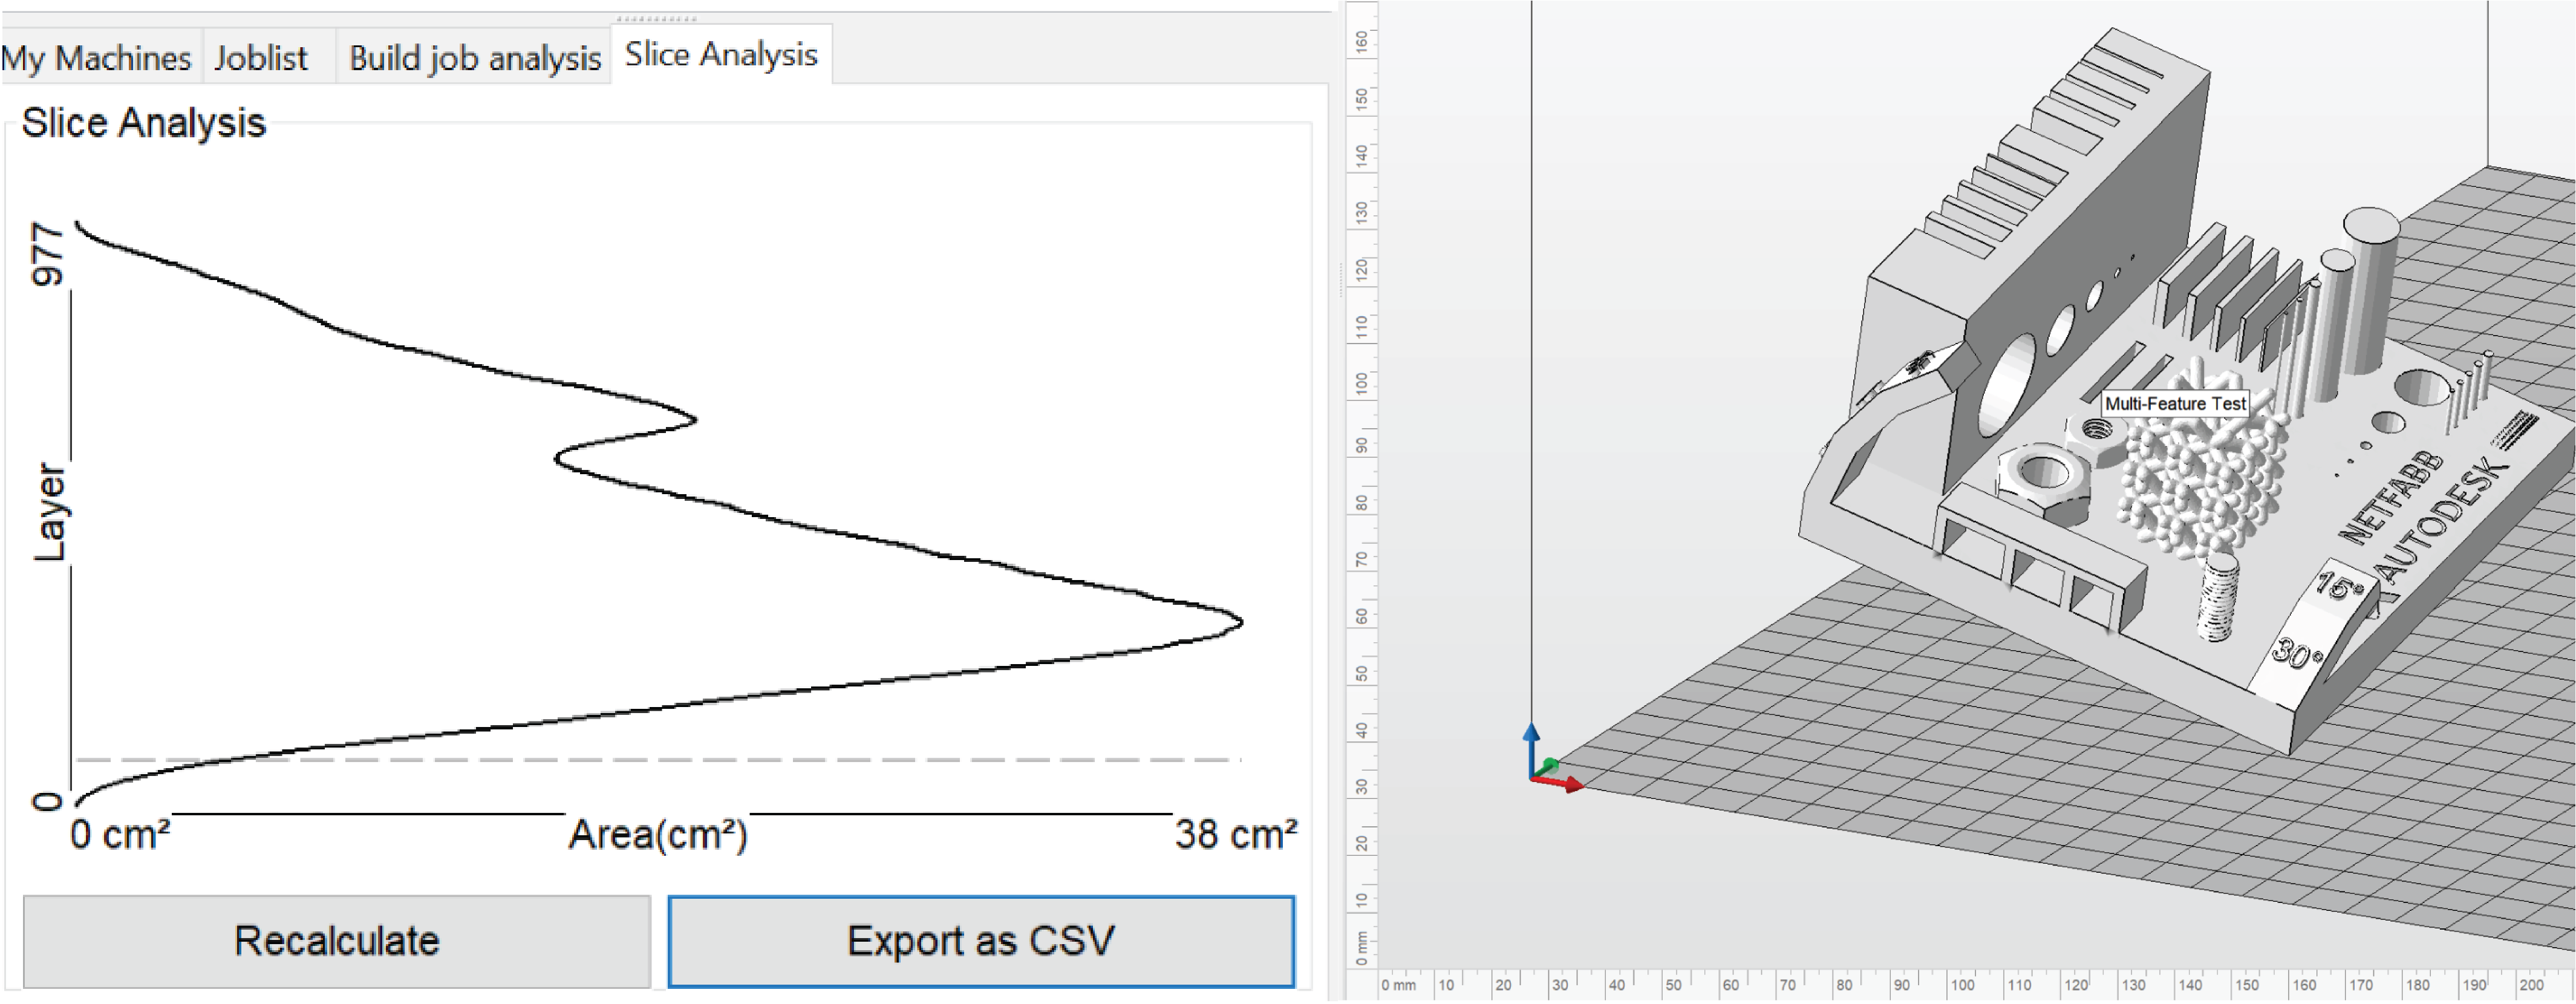
The part rotated 15 degrees in two axis further smooths the graph while also reducing the peak exposure area