| Device |
| D4K™ |
| Pro XL™ |
| Envision One cDLM™ |
The printer calibration allows you to set up compensation coefficients to tune the accuracy of your printer.
1. Generate the L-shaped job in Live Build DLP as stated in Printer Calibration and send it for print.
2. After the L-shaped job is printed, clean it well and post-cure the model as required for the used material.
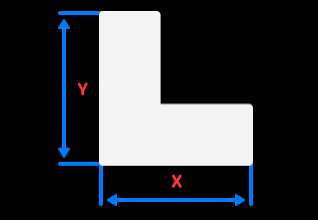
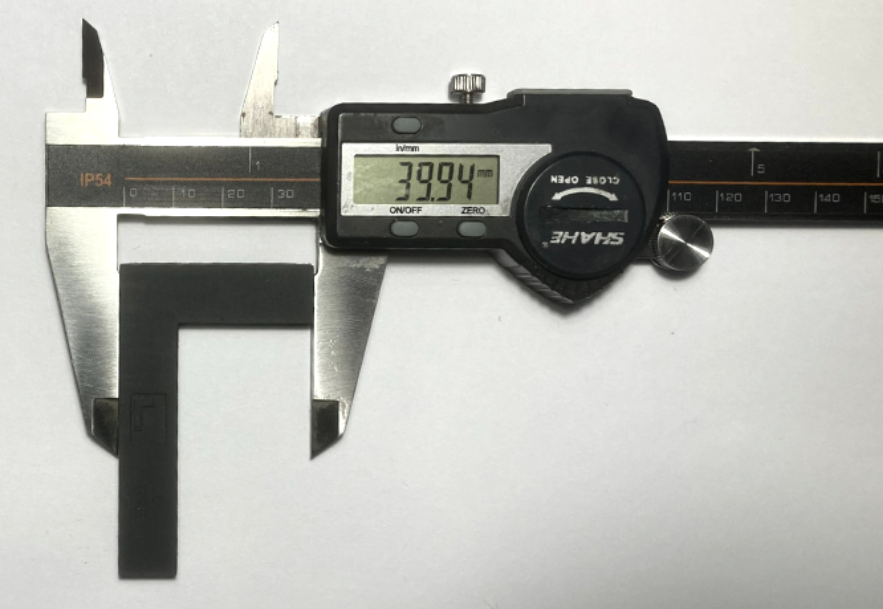
3. Measure the printed model as shown below using a caliper, see Tolerance List.
|
|
4. From the Home screen of the printer, navigate to Settings > Move and Calibration > Quick Calibration.
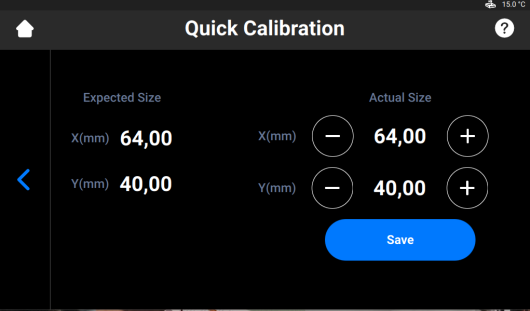
5. Enter the obtained X and Y values in the appropriate fields.
5. Press Save to confirm.
Tolerance List
| Printer | Tolerance, um | L-shaped Model Dimensions Range, mm |
| Pro XL™ | 92 |
X: Between 63.91 and 64.09 Y: Between 39.91 and 40.09 |
| Envision One cDLM™ | 93 |
X: Between 63.91 and 64.09 Y: Between 39.91 and 40.09 |
| D4K™ | 50 |
X: Between 63.95 and 64.05 Y: Between 39.95 and 40.05 |
| Xtreme 8K™ | 150 |
X: Between 63.85 and 64.15 Y: Between 39.85 and 40.15 |